【2024教程全】Hexo博客 + nexT主题
本教程会随着博客升级、主题升级,实时更新,
建议收藏
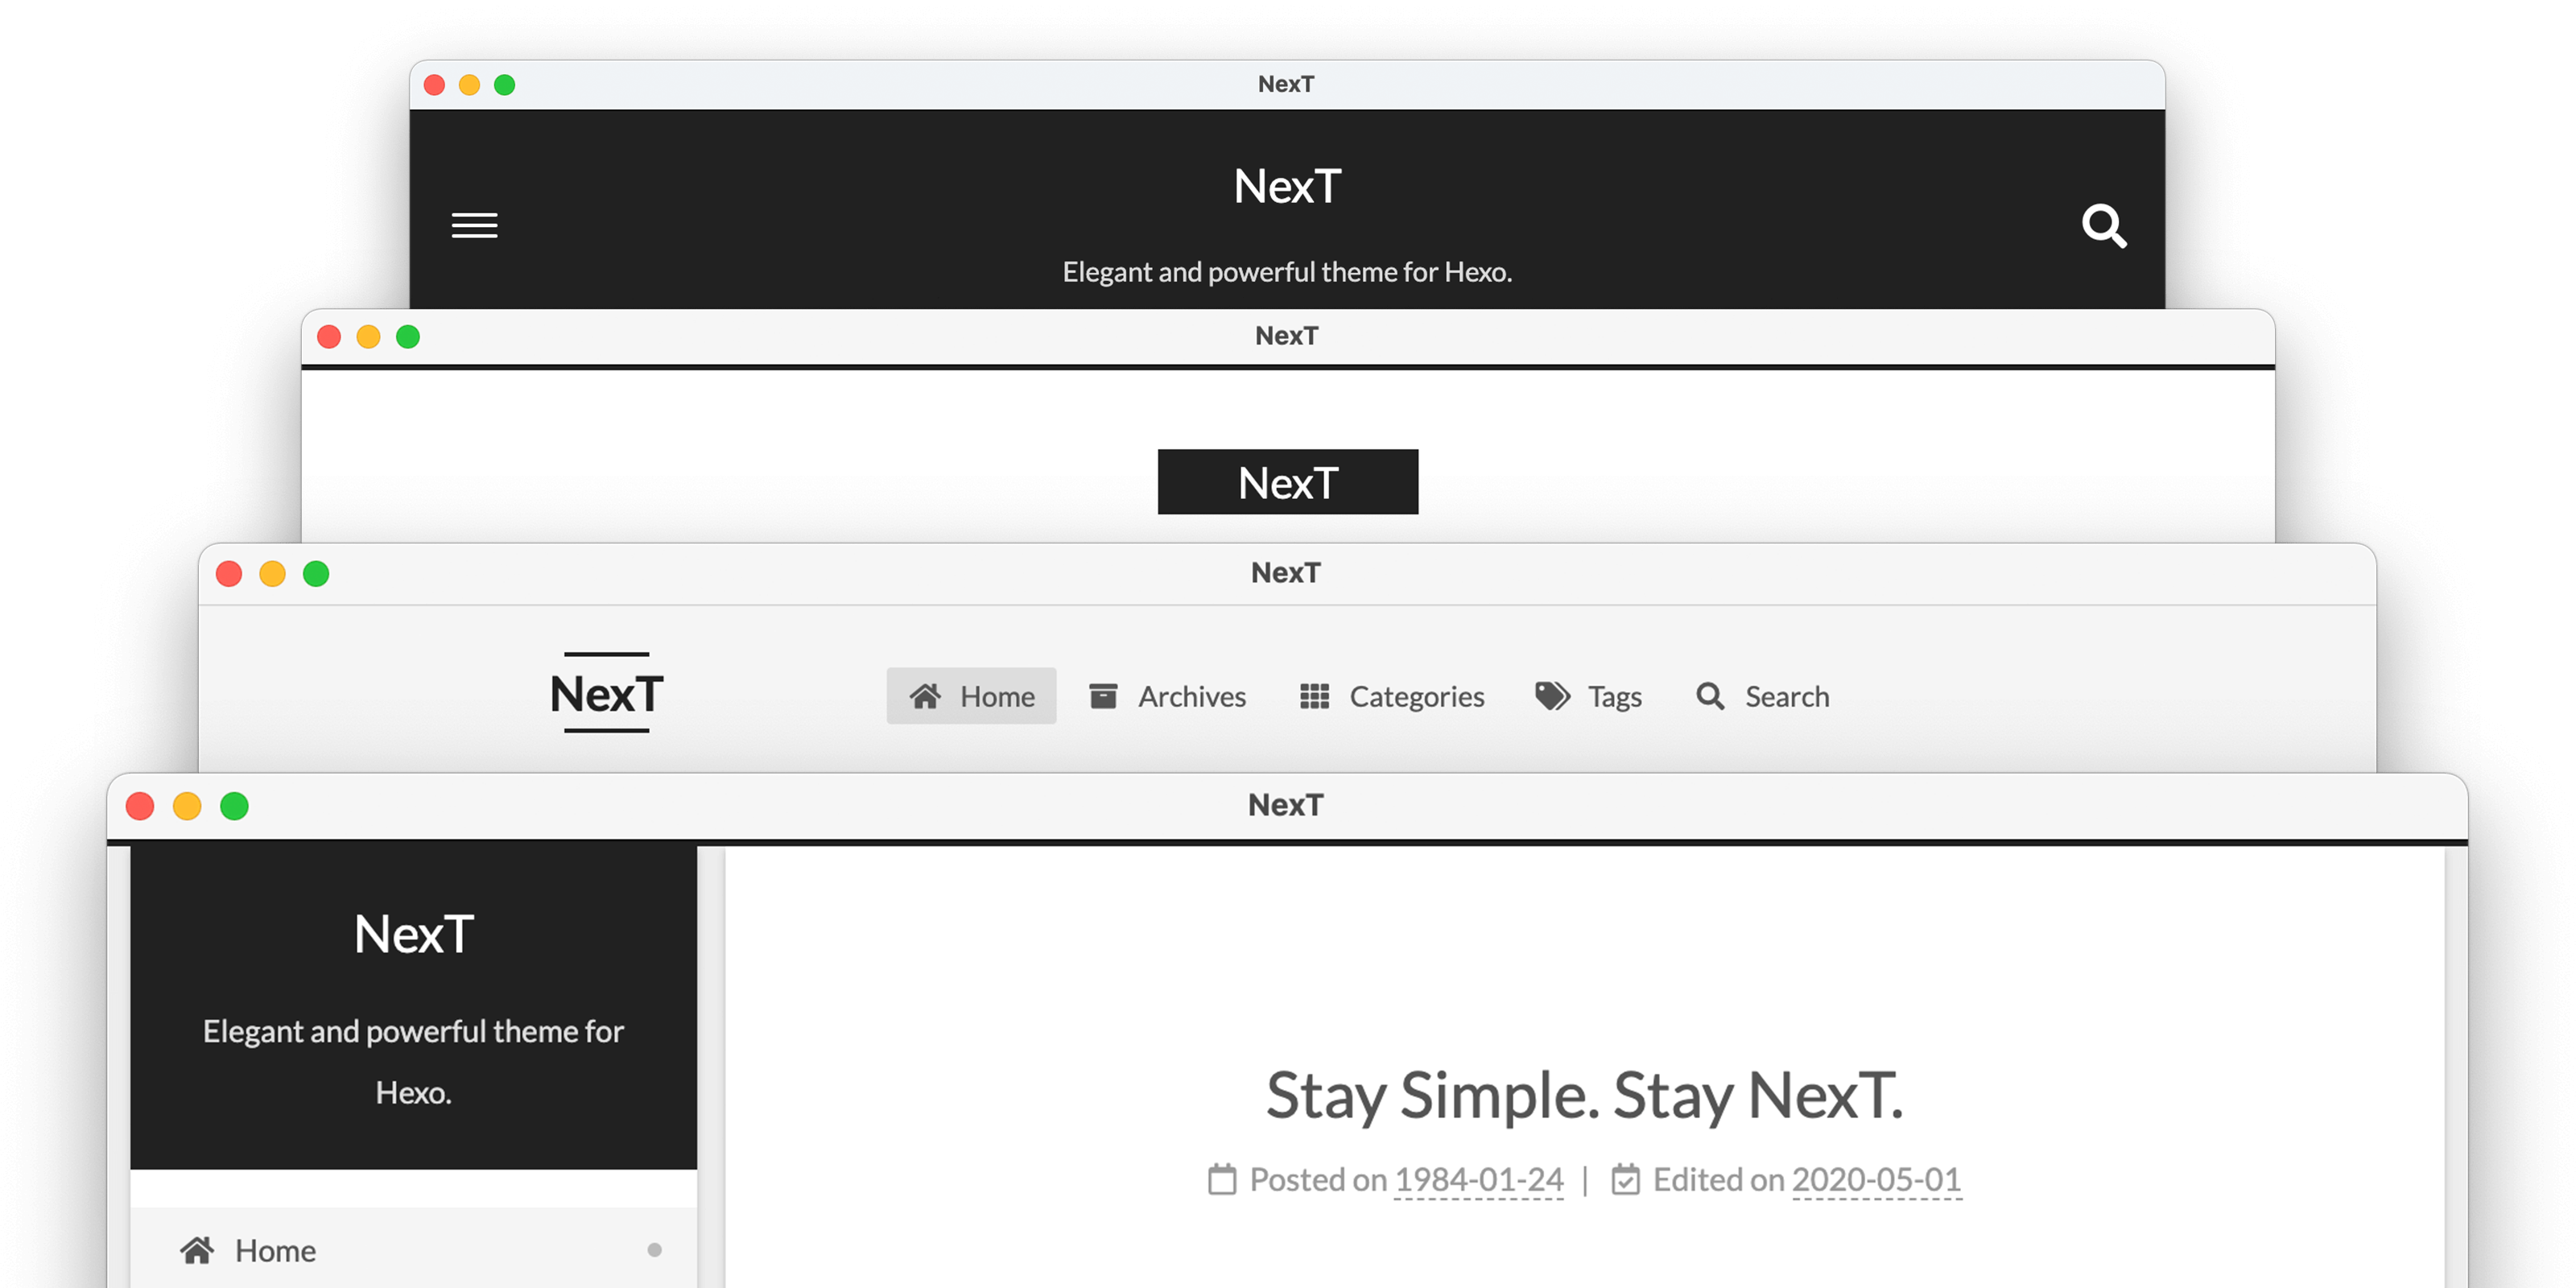
新手快速搭建Hexo博客
nexT主题配置篇
Hexo安装NexT主题
终端控制台cd到博客主题(/themes)目录下,然后输入git clone https://github.com/next-theme/hexo-theme-next按下回车键
即可将nexT主题最新代码克隆到本地themes目录下。
如图:(我克隆过,这里就不回车了)

克隆成功后,将博客目录下的_config.yml配置文件的主题改为hexo-theme-next
成功安装后将 hexo 配置文件中的主题改为 next 就成功了。
# Extensions |
一键4连,刷新配置:
hexo clean && hexo g && hexo d && hexo s |
访问:http://localhost:4000查看是否生效
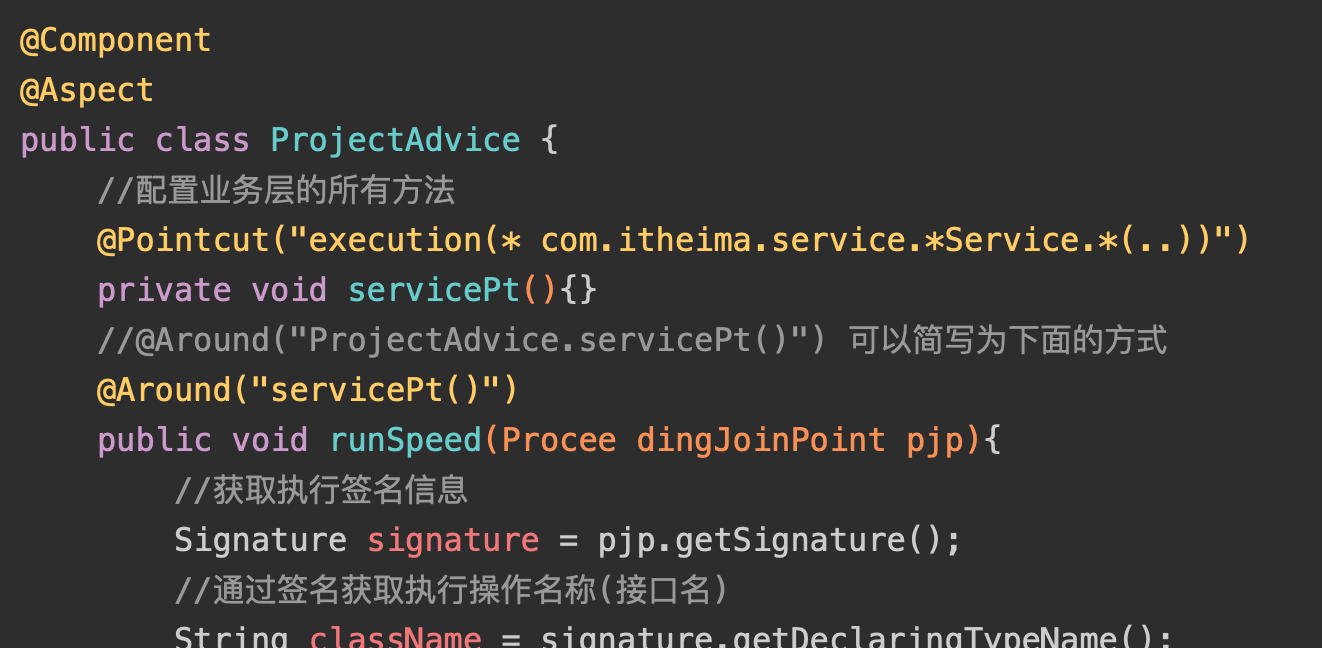
代码高亮
先看效果:
博客下配置文件../blog/_config.yml设置为true
highlight: |
主题下配置文件../blog/themes/hexo-theme-next/_config.yml 配置修改为:
codeblock: |
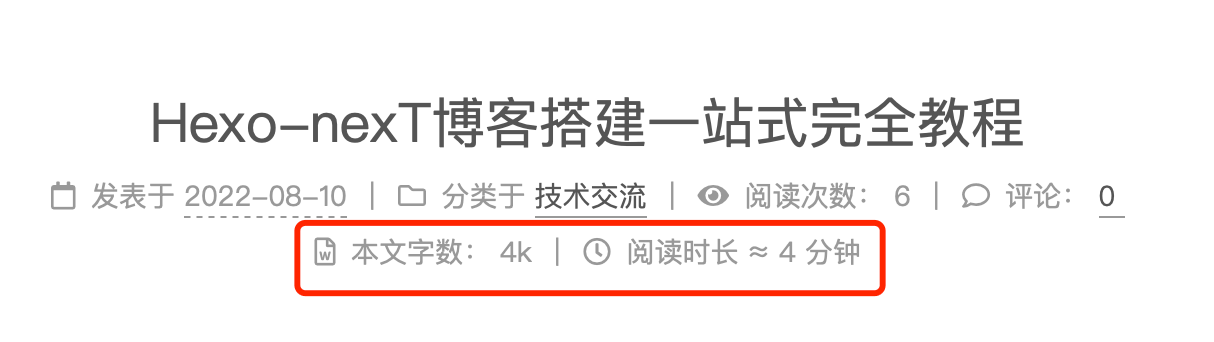
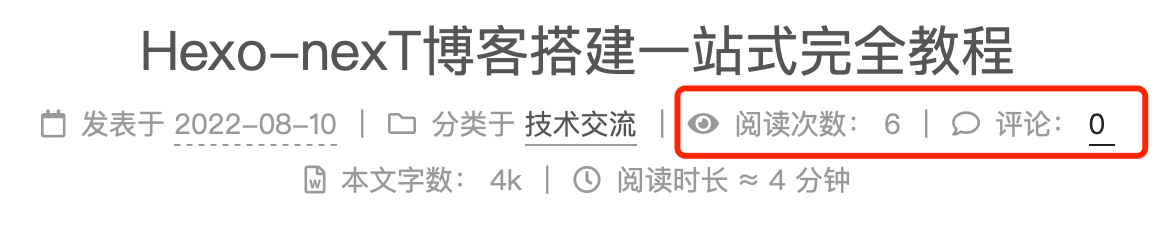
字数统计
先看效果:
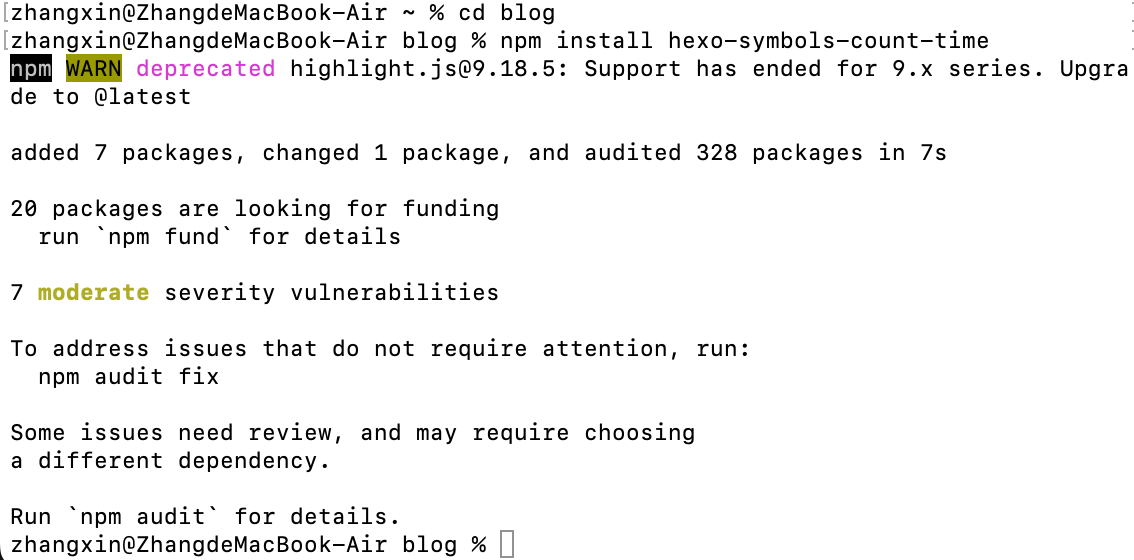
安装字数统计插件
npm install hexo-symbols-count-time |
如图:
博客下配置文件../blog/_config.yml 最后一行新增内容:
symbols_count_time: |
主题下配置文件../blog/themes/hexo-theme-next/_config.yml 配置修改为:
# 字数统计 |
一键4连,刷新配置
hexo clean && hexo g && hexo d && hexo s |
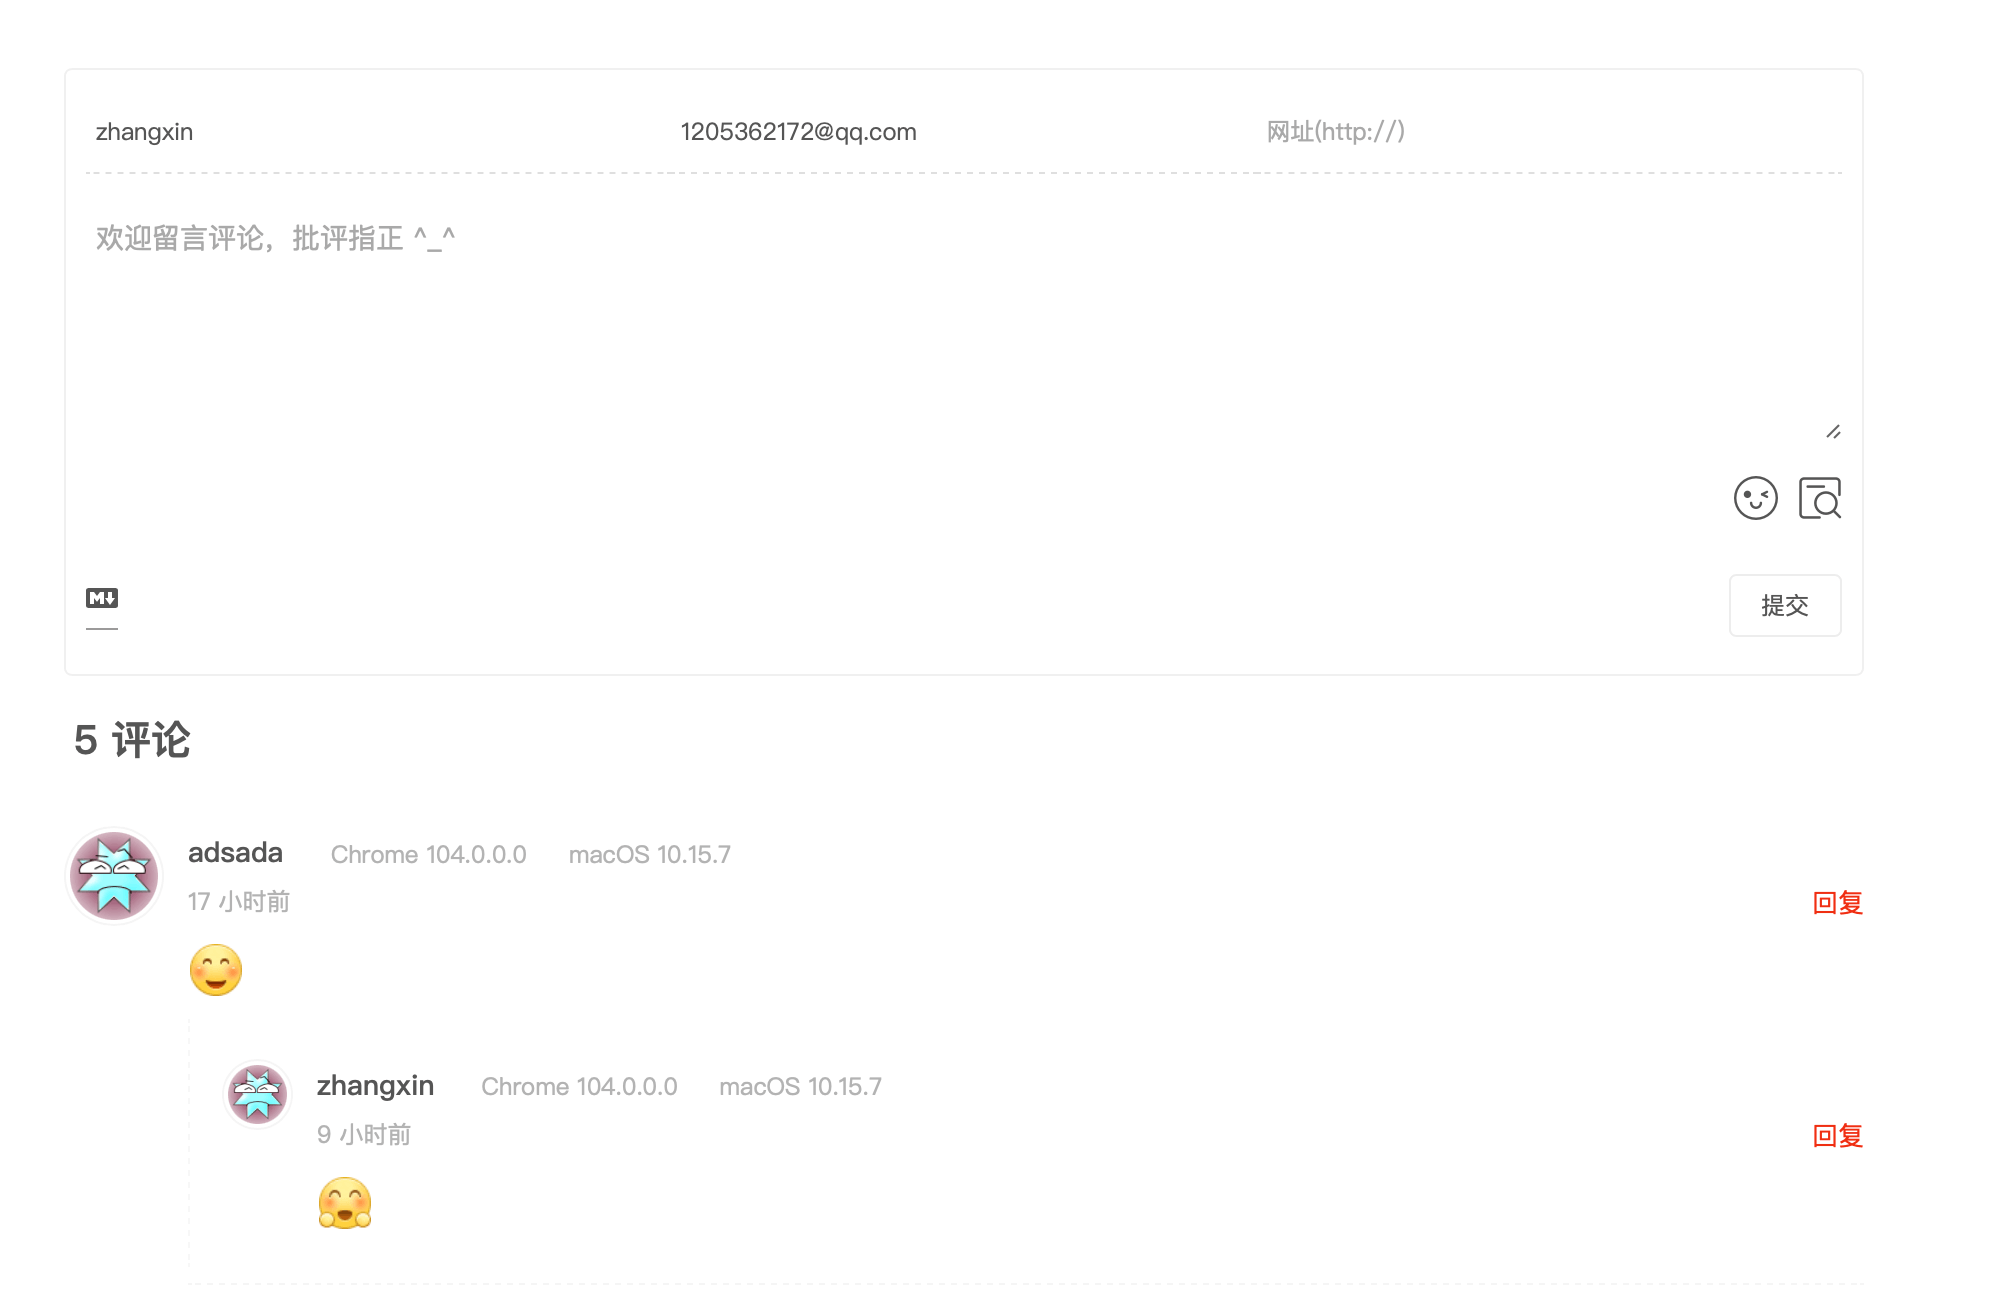
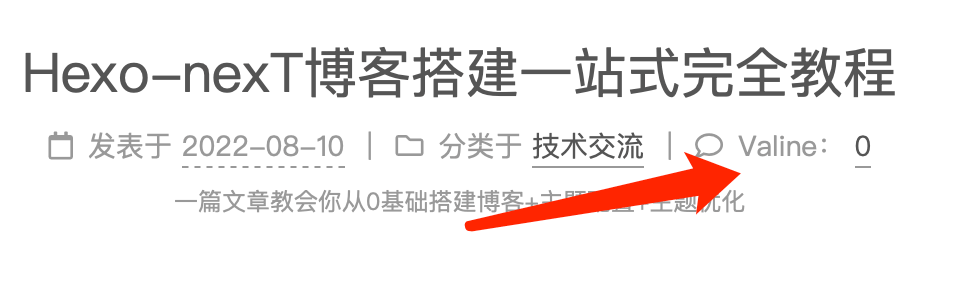
Valine评论系统+阅读数
先看效果:
- 去valine官网注册账号 -> 创建应用
- 进入创建的应用,打开设置 -> 应用Keys,获取AppID和AppKey
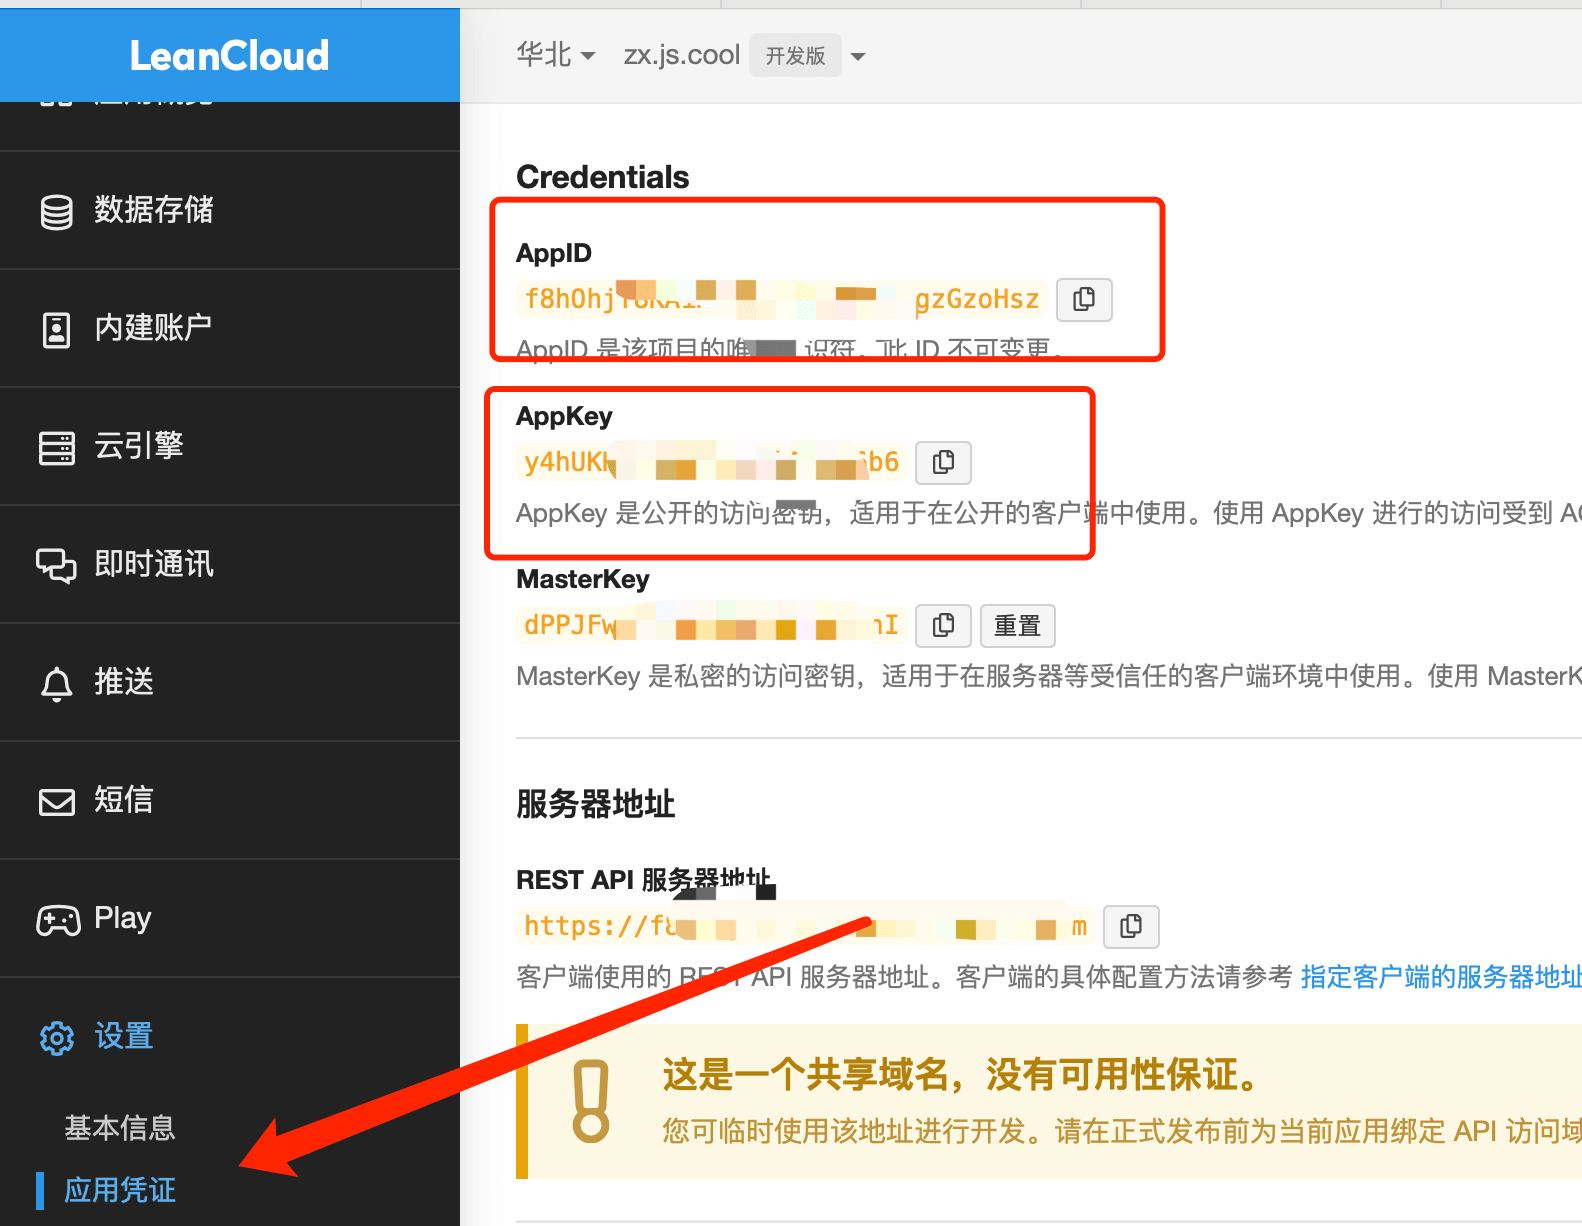
设置 -> 安全中心 打开数据存储

主题下配置文件
../blog/themes/hexo-theme-next/_config.yml配置修改为:# Valine
# For more information: https://valine.js.org, https://github.com/xCss/Valine
valine:
enable: true # 设置为true,默认为false
appid: 刚刚提到的appid
appkey: 刚刚提到的appkey
notify: true # 邮箱通知 , https://github.com/xCss/Valine/wiki,默认为false
verify: false # 验证码 默认为false
placeholder: 欢迎留言评论,批评指正 ^_^ # 初始化评论显示,根据自己修改,这里默认,
avatar: wavatar # 头像风格,默认为mm,可进入网址:https://valine.js.org/visitor.html查看头像设置,这里有许多头像风格,进行设置
guest_info: nick,mail,link # 自定义评论标题
pageSize: 10 # 分页大小,10页就自动分页
language: # Language, available values: en, zh-cn
visitor: true # 用于显示文章阅读量,具体见https://valine.js.org/visitor.html
comment_count: true # If false, comment count will only be displayed in post page, not in home page
recordIP: false # 是否记录评论者IP
serverURLs: # 启用自定义域名时,在此处填写(默认会自动检测,无需填写
#post_meta_order: 0
文章标题评论显示英文Valine的问题
解决方案:在themes -> hexo-theme-next -> language -> zh-CN.yml文件中添加以下部分即可。
# 新添加
comments:
valine: 评论
posted: 发表于
edited: 更新于
站内即时聊天功能
主题下配置文件 ../blog/themes/hexo-theme-next/_config.yml配置修改为:
# next 主题支持在线聊天服务,支持两个插件 charta 和 tidioA,这一部分自认为没有必要,所以我也没有配置 |
全文搜索
先看效果:
安装插件:
npm install hexo-generator-searchdb --save |
博客下配置文件 ../blog/_config.yml 最后一行新增内容:
search: |
主题下配置文件 ../blog/themes/hexo-theme-next/_config.yml配置修改为:
# Local Search |
一键4连,刷新配置
hexo clean && hexo g && hexo d && hexo s |
博客主标题上方的logo
主题下配置文件 ../blog/themes/hexo-theme-next/_config.yml配置修改为:
# Custom Logo (Do not support scheme Mist) |
版权信息声明
主题下配置文件 ../blog/themes/hexo-theme-next/_config.yml配置修改为:
# Creative Commons 4.0 International License. |
开启打赏功能
主题下配置文件 ../blog/themes/hexo-theme-next/_config.yml配置修改为:
# Reward (Donate) |
nexT主题配置文件_config.yml解读
Hexo优化篇
新建博文时模版
给网站添加本站运行天数
统计网站与文章的浏览人数及次数
修改文章永久链接为随机编号
图片压缩、转webp加速
jsDelivr加速(jsDeliver在国内已经失效了,PASS)
Vercel托管加速
cloudflare-Pages###cdn加速
DNSPod-CDN加速
七牛云-CDN加速
又拍云CDN加速(域名需备案)
备份技巧
加速部署
404页面定义
vercel配置404
如何免费申请js.cool二级域名
docker运行hexo镜像
丝带背景
首页隐藏特定文章
加速部署
nexT优化篇
增加小顶栏(工具栏)
效果:

/Users/zhangxin/blog/themes/hexo-theme-next/layout/index.njk 首页文件新增如下内容:
{% block content %} |
其他页面同理。
Next8.0以上去除valine了,安装waline
官网教程:https://waline.js.org/guide/get-started.html 一系列操作拿到serverURL
然后安装next集成waline的插件即可
npm install @waline/hexo-next |
主题配置文件新增:
# Waline 配置文件 |
评论管理 (管理端):
Hexo的NexT8.8使用Gitalk
https://blog.csdn.net/a171232886/article/details/121206824
[gitalk] 解决配置gitalk插件后初始化登录时跳转回首页
NexT 主题内置标签
https://blog.lihj.me/post/next-tag-plugin-instruction.html
{% tabs 选项卡 2 %} |
暗黑主题可界面切换
npm install hexo-next-darkmode --save |
主题配置文件修改:
# Close NexT's darkmode |
主题配置文件新增:
|
分类页将时间和文章名显示在同一行
效果:

themes/hexo-theme-next/layout/_macro/post-collapse.swig 这两个div改成span
<span class="post-meta"> |
页面加载期间顶部的进度条
cdfj theme/hexo-theme-next 目录下,然后
git clone https://github.com/theme-next/theme-next-pace source/lib/pace |
主题配置文件修改:
#页面加载期间顶部的进度条。 |
可修改进度条颜色:
themes/hexo-theme-next/source/lib/pace/pace-theme-flash.min.css
文件内容 background:#f81ce5 搜索替换为 background:#fc6423
Gemini调整页面宽度
修改文件source/css/_variables/Pisces.styl,调整如下
$content-desktop = 'calc(100% - %s)' % unit($content-desktop-padding / 2, 'px'); |
数值可以调整
其他主题:
NexT自带的4个主题的页面宽度调整方式不一样,其他模式可参考How to Change Content Width
站点地图
npm install hexo-generator-baidu-sitemap --save |
更改完成后,每次进行打包的时候,会自动在public文件夹下生成sitemap.xml和baidusitemap.xml分别用于Google和百度。
将页面提交到服务器后,通过域名/sitemap.xml或者域名/baidusitemap.xml可以进行访问sitemap。
nexT友联单独开个页面
about页优化(待更新。。。)
添加看板娘
npm install --save hexo-helper-live2d |
博客目录下配置文件 /Users/zhangxin/blog/_config.yml 添加:
# zhangxin 新增 |
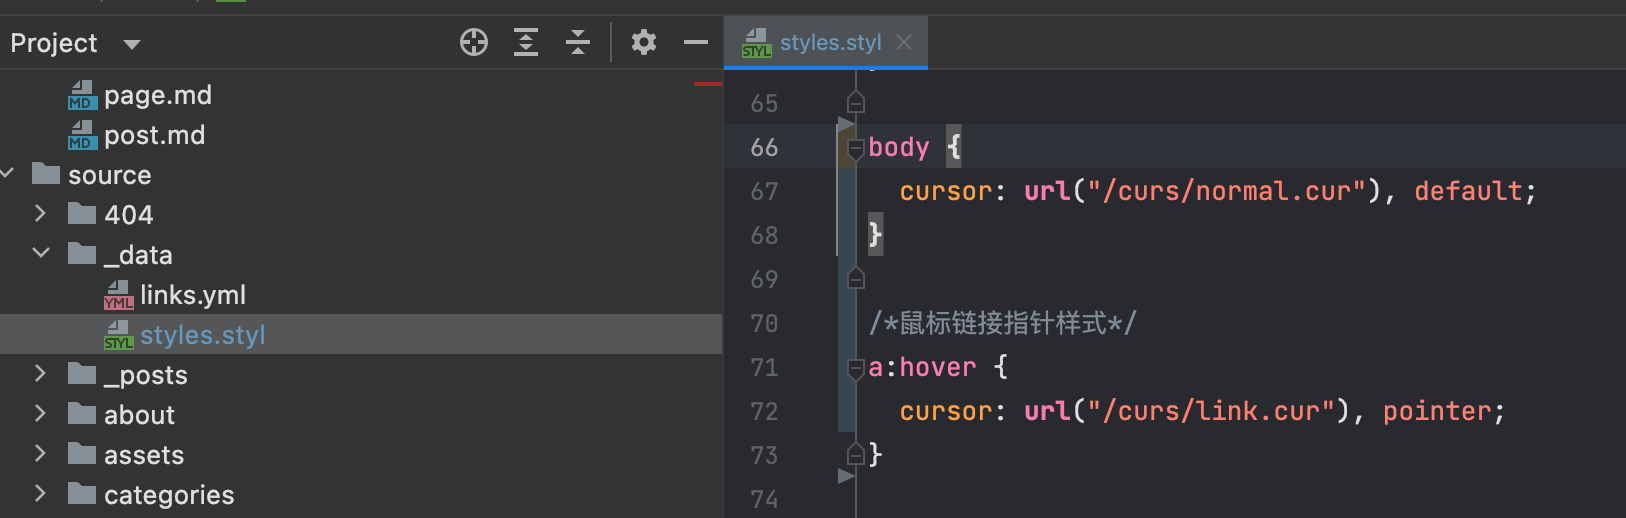
更换鼠标样式
第一步:blog目录下新建 source/_data/styles.styl 文件,填入:
body { |
如图:
第二步:下载curs,放在 themes/hexo-theme-next/source 目录下即可
点击随机彩带背景
themes/hexo-theme-next/_config.yml 打开配置
canvas_ribbon: |
cd themes/next 然后克隆即可
git clone https://github.com/theme-next/theme-next-canvas-ribbon source/lib/canvas-ribbon |
如果不想每次点击界面都切换
themes/hexo-theme-next/source/lib/canvas-ribbon/canvas-ribbon.js 注释这一行
// document.onclick = redraw; |
只修改文章内链接颜色
themes/hexo-theme-next/source/css/_common/components/post/post-expand.styl .post-body {} 内加上:
a:not(.btn){ |
Bug收集篇
解决live2d看板娘和busuanzi不蒜子计数冲突
https://www.boyinthesun.cn/post/error-live2d-busuanzi/
HEXO博客使用LeanCloud报错“Counter not initialized! See more at console err msg.”
https://blog.csdn.net/w573719227/article/details/100704952
其他杂记
Hexo-资源
- Hexo
- 繁星
- 91导航
- 12580code
- 咖啡吧导航
- zzzmh
- navigate.ednovas.xyz
- API收集
- gridea
- 使用Github Action实现全自动部署 | Akilarの糖果屋
- 使用github-action推送博客部署仓库至NPM | Akilarの糖果屋
- 把Hexo博客部署到服务器
- https://console.leancloud.cn
- 主页demo.zip
butterfly主题
- Butterfly
- Akilarの糖果屋
- MuJin’s Blog
- 小冰博客
- 小康博客
- 小嘉的部落格
- Code皮皮虾
- Wind
- Hexo-Butterfly 主题参考手册
- Butterfly 主题的所有美化
3-hexo主题
- 叶落阁
- 文章置顶功能: 直接加入
top: 1即可 - 3-hexo 添加音乐插件
- 3-hexo主题时的快照
先fork原仓库,然后clone自己fork的仓库,这样后续改动可以提交到git仓库。
cd themes目录下git clone git@github.com:zx20219898/hexo-theme-3-hexo.git
Matery主题
- 闪烁之狐
- 夜法之书-博客
- hexo-theme-matery使用说明
- matery主题教程-夜法之书
- 添加博客看板娘
- 取消hexo的matery主题的背景图遮罩颜色
- hexo(matery)背景、滚动条优化+增加点击跳评论
- 目录能否支持下滑动?现在目录过长就看不到下面,没法下滑
nexT主题
https://github.com/next-theme/hexo-theme-next :新仓库v8.12.3,推荐
-
对于 Pisces Scheme,需要同时修改
header的宽度、.main-inner的宽度以及.content-wrap的宽度。例如,使用百分比(Pisces 的布局定义在source/css/_schemes/Picses/_layout.styl中):header{ width: 90%; }
.container .main-inner { width: 90%; }
.content-wrap { width: calc(100% - 260px); }我并未对这个布局进行测试,自定义修改需要自己进行测试。另外,我觉得超过一定宽度后(一行内文字太多导致换行跨度太大),阅读体验都不怎么样。